Sept 2017 Firmware Upgrade for Yaesu FTM-400 and FTM-100
| Using the RT Systems ADMS-M400 or the ADMS-M100 Programmer | ||
| after the Firmware Upgrade | ||
| Yaesu released firmware upgrades for each the FTM-100 and the FTM-400 in September of 2017. The most significant changes to the radio involved the digital IDs, the number of those available, and how they are stored in memory. RT Systems became aware of the firmware upgrade the day after it was released and began immediately working on the changes needed for the RT Systems ADMS-M400 and ADMS-M100 Programmers. An update to the RT Systems ADMS-M400 Programmer was released on September 20 that addressed the changes in the radio. The update for the RT Systems ADMS-M100 Programmer followed a few days later. When you complete the firmware upgrade on the radio, you can set it up again using your original programming file. Just as there was an order to the process for the firmware upgrade, there are a few steps required to get realign the radio and its programmer. Those steps are outlined here. | ||
| 1) Complete the firmware upgrade according to the instructions published with it. Questions about the firmware upgrade should be directed to Yaesu's tech support. | ||
| 2) Run the RT Systems ADMS Programmer for your radio. Click on Help | Check for Updates in the Programmer. Complete the update for the Programmer. | 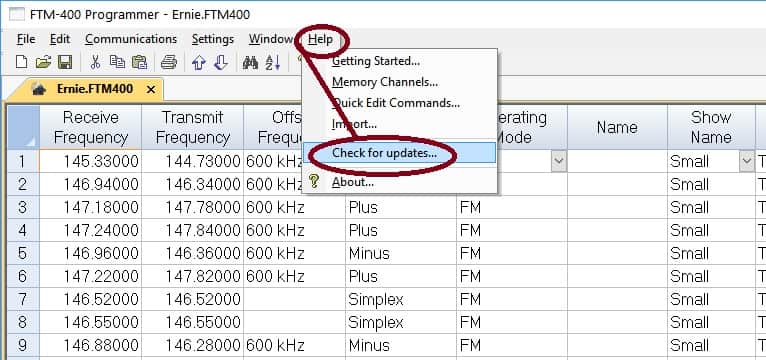 | |
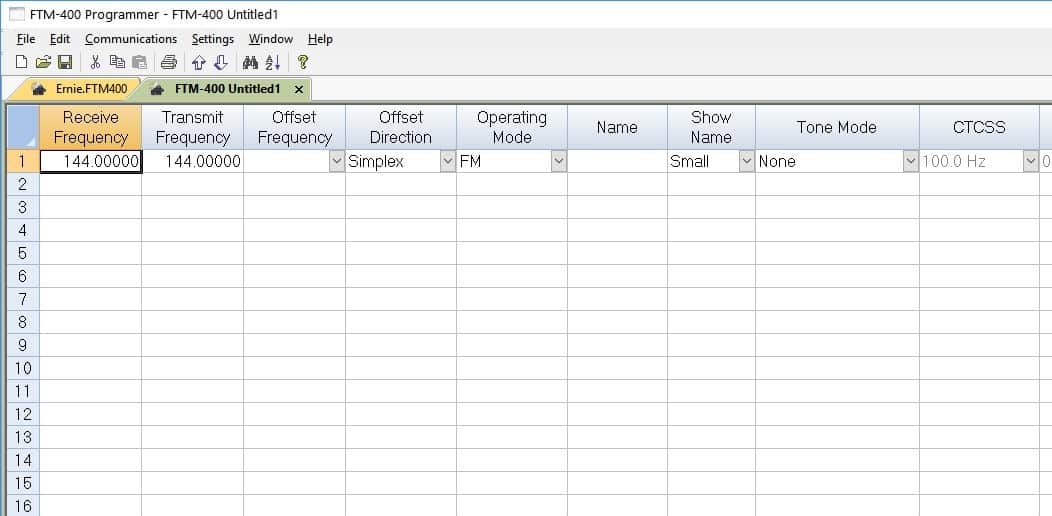
| 3) Open the RT Systems Programmer for your radio and select File | New. This opens a new spread sheet and protects the file that contains the details you want to use to program your radio. | ||
 |  | |
| 4) Complete Communications | Get data from radio. This lets the RT Systems ADMS-M400 or ADMS-M100 Programmer know that the radio has been upgraded. Note: If you are using the SD card to program your radio rather than the cable, your process is a little different. That process is detailed here for the FTM-400 (the process is similar for the FTM-100). You will not be able to send a file back into the radio from the SD card if you skip this. (It may look familiar. It was the first thing you did when the radio and SD card were new.) | 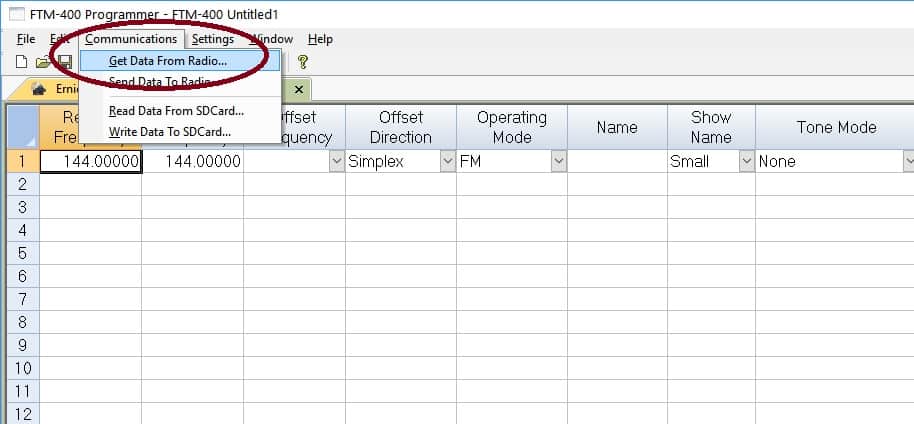 | |
| 5) Adjust the Digital IDs for the radio. These options are addressed on the Group Monitor/Messaging screen of the Settings file of the RT Systems Programmer. Shown here are the original and the changed screens for setup of this option. | ||
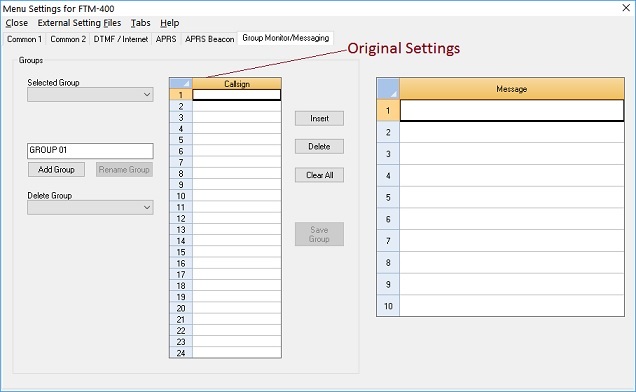 | 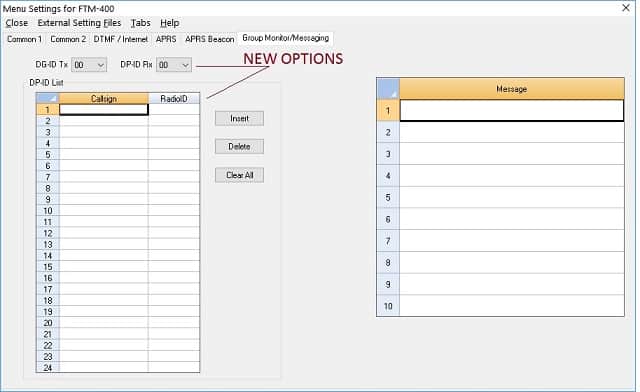 | |
In the original there were 17 groups of 24 callsigns each. You communicated with people within the group you were operating. The digital squelch codes ranged from 0 to 126. In the upgraded system, the digital squelch codes are replaced by DP-IDs, or digital IDs, which range from 0 to 99. There are DG (group) and DP (personal) IDs. There is a DG-ID for TX and RX. The DP-ID list with Callsigns and Radio IDs can be a list captured on the radio when a signal is heard. Once captured, you can use the tools of the Programmer to make changes in the list. You can gather the same information from the radios in your group and enter it through the RT Systems Programmer. This is personal (DP) information for each of the radios in your group.
| ||
| 5) Select the file (File | Open) you want to use to program the radio. The Programmer will adjust the file to suit the upgraded radio. Note: If you are using the SD card to program your radio rather than the cable, your process is a little different. That process is detailed here for the FTM-400 (it is similar for the FTM-100). While you will be able to write the file to the SD card, you will not be able to process the file back into the radio from the card if you skip this. Just as with the cable, you must tell the Programmer that the radio has been upgraded. | 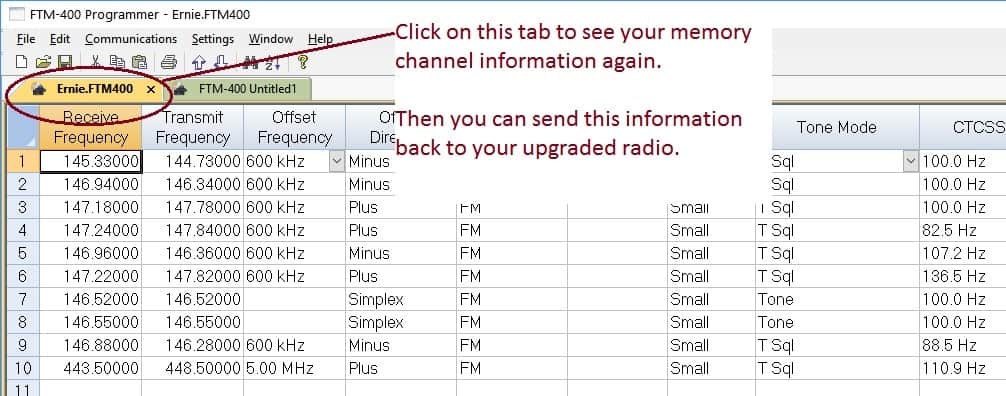 | |
That was a lot to read... briefly.
| ||
| If you have questions about this process, feel free to contact our tech support. | ||
10/03/2017 11:00AM
Was this article helpful?
That’s Great!
Thank you for your feedback
Sorry! We couldn't be helpful
Thank you for your feedback
Feedback sent
We appreciate your effort and will try to fix the article